
PiCar - Raspberry Pi Car Radio Project - Part 4
PiCar - Raspberry Pi Car Radio Project - Part 4
An overview of the software

In this article I want to continue the discussion about my Raspberry Pi based automotive radio project, PiCar. I previously wrote an introduction to the project as well an a overview of the hardware involved. In this installment I would like to talk about the code that I wrote to make this all work.
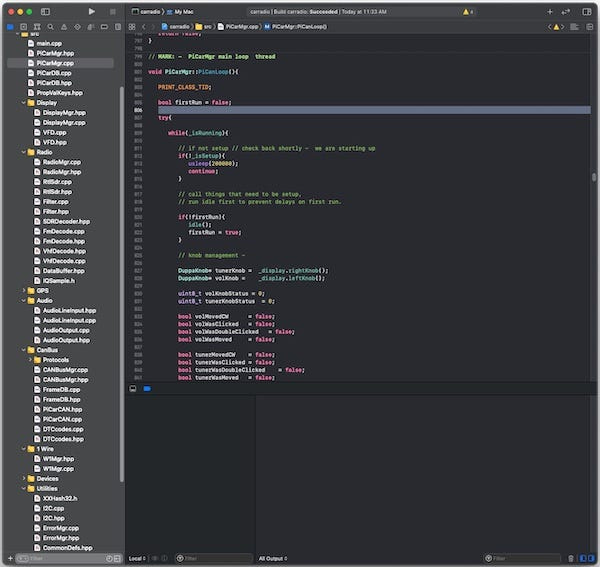
PiCar quickly became a non trivial project with more than 100 files mostly written in C++ 17. I chose to use the LVMM Clang compiler and CMake package system. Out of habit, I use Xcode on macOS do do editing and syntax and unit check. Ultimately I use Git and GitHub as my code upload system.
The Raspberry Pi used in PiCar is headless, it only has command line available on the serial console. But while it’s in development I still have ssh open. For security reasons, I will shut off any Network access once it’s in production.
On occasion I have used Visual Studio Code, but I don’t really like it. I have also experimented with a few cross compile systems, but none of them were great, or failed once you put load on them. I’d love to hear other peoples experience on this topic.
The Modules
At the present, PiCar is logically broken into about six modules, each encapsulated as a separate or C++ class. These classes include:
PiCarMgr. - primary control of the PiCar systemDisplayMgr- User Interface display and updateRadioMgr- SDR device management, demodulation and audio conversionGPSmgr- Talks to u-blox GPS subsystemCANBusMgr- Talks to CAN bus, decodes packets and keeps track of statusW1Mgr- talks to OWFS for Temperature sensors.
In addition there the PiCarDB class which keeps track of latest values from various sensors and devices, such as GPS location, or the current ODB2 engine diagnostics codes. The PiCarDB also maintains any persistent properties or user preferences. For example the last radio station tuned.
These classes each spawn their own separate linux thread. so that they can operate concurrently and independent and of each other.
This makes for a snappy user experience and it isolates the user from any slowdowns caused by communications with various peripherals. Radio demodulation doesn't slow down the responding to a use turning a knob.
See video below- (YouTube muted the music)
POSIX threads
The primary reason I chose to develop PiCar with the Raspberry Pi vs something like an Arduino is because the Pi is based on modern linux. Which gives me many useful drivers and modern process and thread management.
In Linux, your program runs an a independent process. Along with whatever other code is running on the background. The PiCar program is one of these processes. But PiCar also has multiple independent streams of execution, for the modules mentioned above.
In contrast, the Arduino systems basically run one single program, that you start on boot up. If you need to run multiple streams of execution you must add a lot of code to simulate the multitasking. Arduino development has its place, and is quite acceptable for simple systems, but the PiCar is way to complex in both OS and memory needs.
PiCar takes advantage of linux threads to split up these streams of execution. The thread system allows PiCar modules to share the same code space, but give each module a separate stack and program counter.
An example of how sharing the code space enables the modules to interact efficiently can be observed when the use changes channels:
The
PiCarMgrthread detects a change in the channel selector knob, it informs theRadioMgrthread that a new station is selected.The
RadioMgrthen changes the variables used by the SDR tuning and demodulation code.In turn the
DisplayMgrpicks up that the station has changed and updates the VFD display.
All of this happens seamlessly.
Threads have been around in C for quite some time. The POSIX standard has a model called pthreads that presents a platform independent way to specify and communicate between threads. To make things more portable, there is even a standard in C++ called std::thread that is an attraction built upon pthreads. Even so, I opted the for the pthreads API in my C++ code, since it took very little work to wrap my classes.
The PiCar thread pattern
There is a common code pattern that I use in the PiCar system. It will become evident, if you examine the FooMgr class in the theadsample code that I posted at on GitHub.
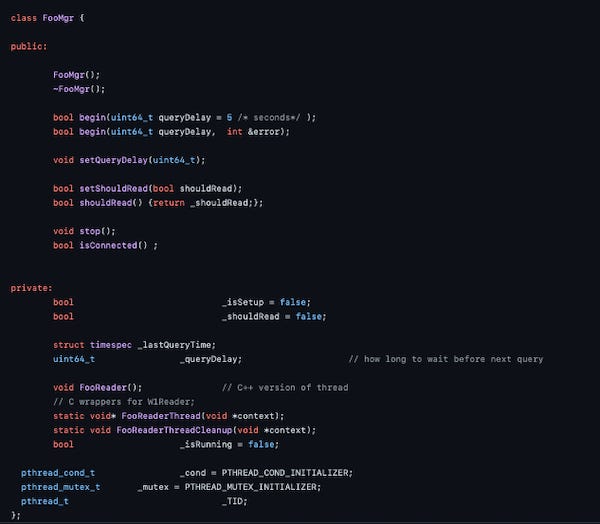
The class creator FooMgr() calls pthread_create to fire off a thread that calls the wrapped code FooReaderThread, which in turn calls the FooMgr::FooReader() method. FooReader sleeps the thread and wakes up on occasion to check if the _isSetup and _shouldRead booleans are set. It then checks to see if the appropriate amount of time has elapsed before performing its function and then sleeping again. Thus the code will run periodically and concurrently from other threads.
If you want to download and build this sample yourself, do the following:
git clone https://github.com/vinthewrench/threadsample.git
cd threadsample
mkdir build
cd build
cmake ..
make
bin/threadsample
There is also an Xcode project file if you are running macOS.
This is a simplistic example, but it is good to demonstrate the concepts. In PiCar, though, you will find that I use additional functions like pthread_cond_timedwait, gpiod_line_event_wait, and even select to sleep and wakeup the threads more efficiently.
My goal was to minimize the amount of CPU time that the PiCar program eats up. Less CPU time equals cooler running CPU.
PiCarMgr - the main loop
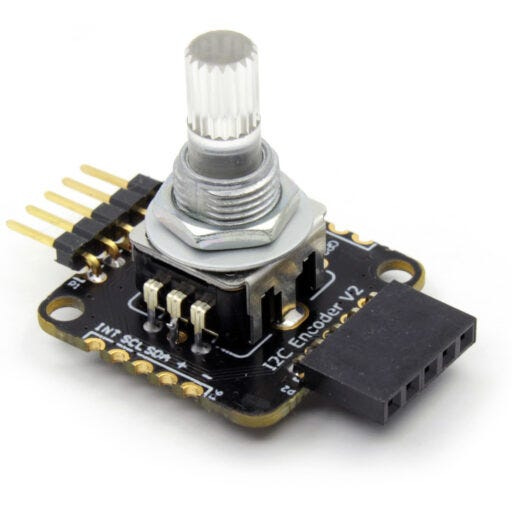
The PiCarMgr presents a much more sophisticated example. It runs the same pattern as FooMgr, but instead of just sleeping for a period of time, it sleeps waiting for a change of state of GPIO . The GPIO line is hooked up to the DuPPa encoders used for volume and tuning.
When the knob is turned the following occurs:
The encoder pulls the INT line low.
INT is connected to GPIO line 27 which in turns causes the
PiCarLoop()thread to wake up.PiCarLoopreads the status of the knobs over the I2C bus and decodes if it was a change in knob position or a click.PiCarLoopthen invokes code to process the knob movement or clicking.
If no changes have occurred with 1/2 second, the PiCarLoop will also wake up and run some idle tasks such as retrieving data from other sensors and updating the database as needed.
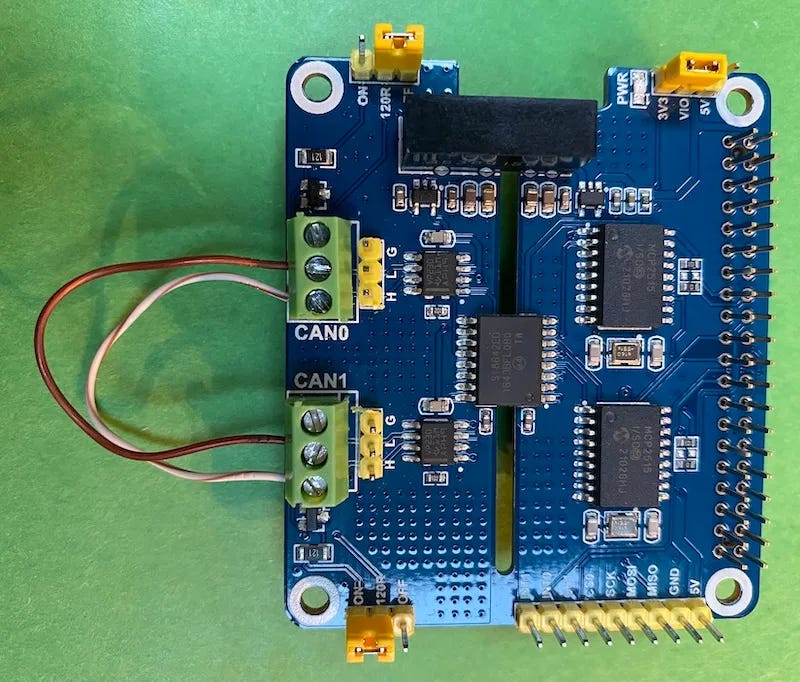
CANReader - reading from the CAN Bus
CANBusMgr is another example similar to the PiCarMgr. The major difference is that it waits on CAN bus network traffic using the select unix socket API. When the CANReader() thread wakes up, it performs a read operation through SocketCan.
Please look at my article Hacking your Car Network - Part 4 ,if you want the understand how you can use SocketCan too.
Once the CANBusMgr gets a CAN packet, it invokes the FrameDB::saveFrame method which then decides if any post processing is required. FrameDB not only tracks the state of various CAN devices, it also has code written to further decode the CAN packets and extract what those packets contain.
For example, If we receive a CAN packet on the GMLAN interface with a ID of 0x3F9, this indicates that this is a “Engine General Status 3” packet.
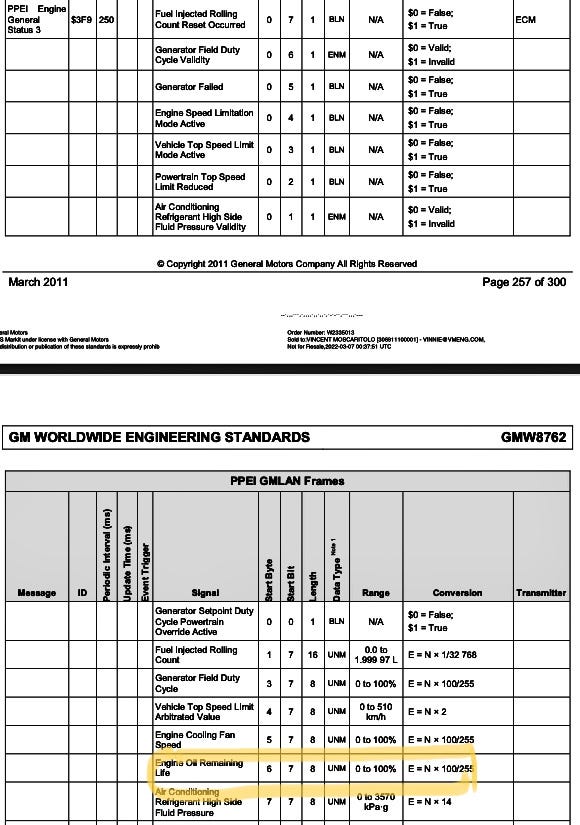
We can then determine that looking at byte 6 of the frame will give us the remaining oil life:
float oilLife = (frame.data[6]* 100) / 255.0;This value then gets stored in the FrameDB as under the key GM_OLF and then later displayed by the DisplayMgr.

DisplayMgr - Talking to the user.
The DisplayMgr employs a more sophisticated use of pthreads. Similar to the other two examples, the DisplayMgr will sleep it’s DisplayMgr::DisplayUpdate thread until an event occurs. But it uses the pthread_cond_timedwait API to wait for change in the condition variable _cond.
For example:
The user rotates the channel selection knob, which is picked up thePiCarMgr.
ThePiCarMgrtells theRadioMgrto change channels by callingRadioMgr::setFrequencyandModeAPIThe
PiCarMgrthen callsDisplayMgr::showRadioChangewhich calls theDisplayMgr::setEventmethod.setEvent makes a call to
pthread_cond_signaland returns.The DisplayMgr::DisplayUpdate wakes up and checks internal variables which indicate that it should either draw or update the Radio screen by calling drawRadioScreen.
This architecture uncouples the display code from the device management code. This is useful for instance if we later wanted to change the display subsystem to use a graphic flat panel display instead of a character based VFD.
A whole lot of code
Even though I tried to avoid feature creep, there is still a huge amount of code running around in PiCar. I tried to make good architecture choices to keep the code manageable, So far it all works pretty flawlessly.

DILBERT ©2001 Scott Adams. Used By permission of ANDREWS MCMEEL SYNDICATION. All rights reserved.